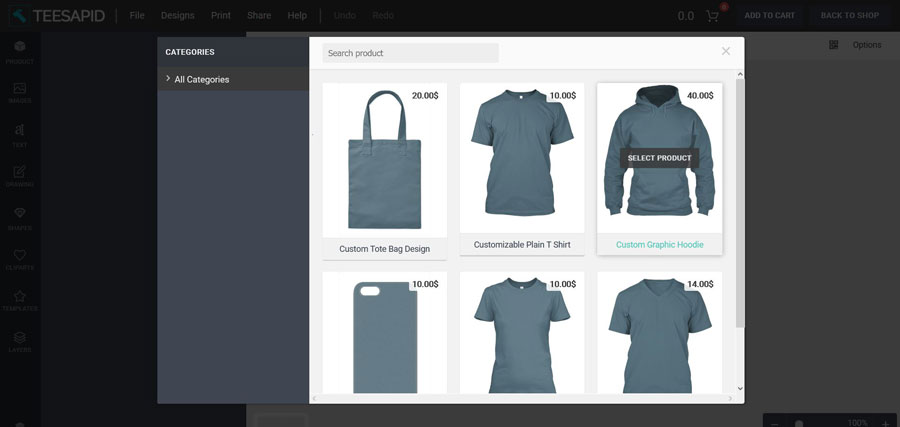
Our shop has a variety of unique products but if none of these products made your heart sing, don’t you worry, use our online custom design tool to come up with your own t-shirt, phone case hoodie or just any other personalized item of your choice. Following are the steps on how to use it.
Step1# Product Selection
Choose the product you want to customize. If you cannot see it, use the search function to find your product. Currently we’ve men’s and women’s round and v-neck t-shirts, phone cases, hoodies and tote bags. More on the way. If your favorite is missing out, do not hesitate to contact us asap!
Step2# Personalization
Once you’ve chosen a product, it is time to start customization.
Color, Size & Quantity
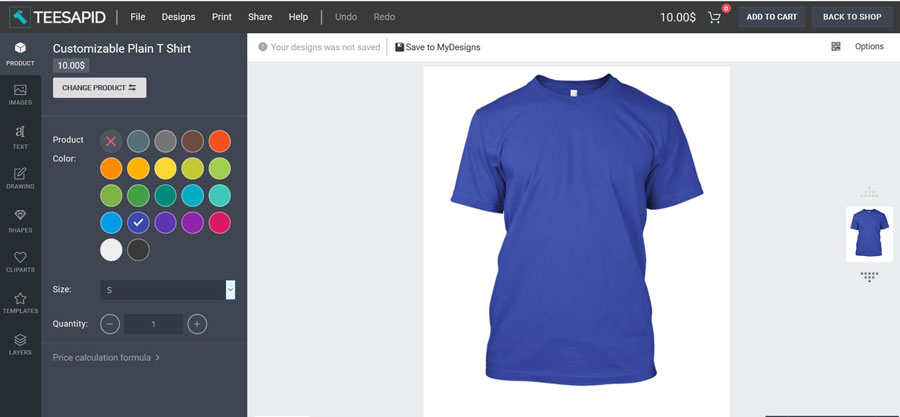
The first option is to choose product color
Below the color options you’ve a drop-down list from which you will choose size
- Small(S)
- Medius(M)
- Large (XL)
- Extra Large (XXL)
After selecting the size, the next option allows you to specify the quantity (number of products you want to order)
Then finally below quantity is the price calculation formula. It will show you how we arrive at the total changes that you will pay.
Adding Elements
After choosing your favorite color, size and quantity, it is time to bring your creativity and imagination into the real world. It is time to have fun! Some of the elements that you can add include;
- Your best images or photos,
- Text
- Drawings
- Shapes
- Clipart
- Templates
Photos/Images
You can add photo elements by uploading your own photos from your devices, browsing on free photo resources (Pixabay), from Facebook or Instagram.
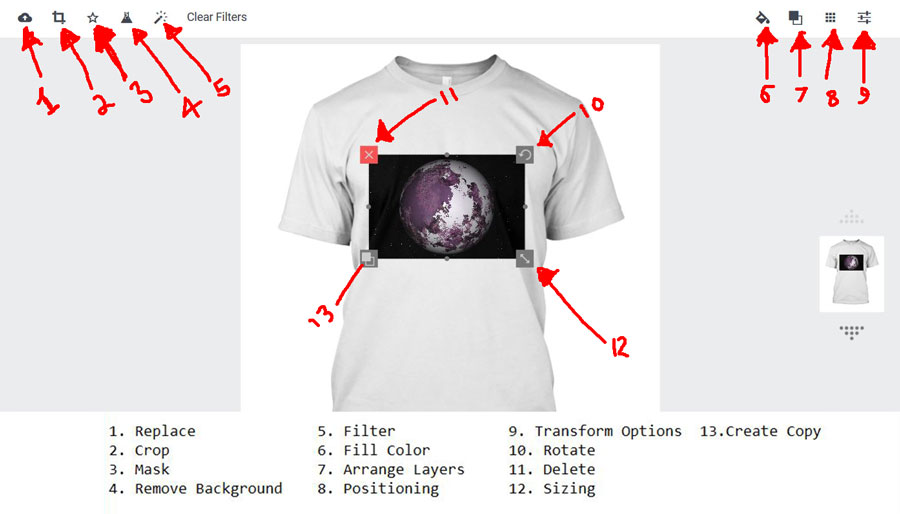
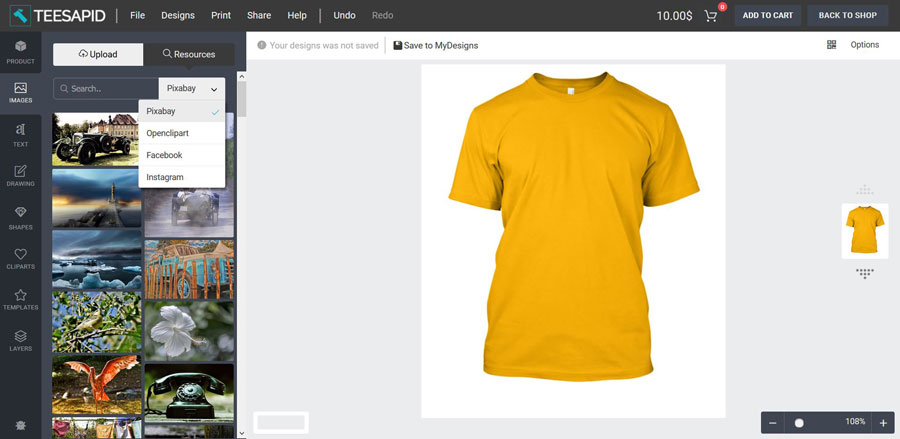 Once you’ve added your photo you can further perform basic actions like replacing, resizing, rotating, positioning etc. as well as advanced actions like masking, removing light or dark background, adding filters, cropping etc. Below is an illustration
 Text
Text
Text is the other creative element you can add while customizing your product. This includes letter, numbers and special characters.
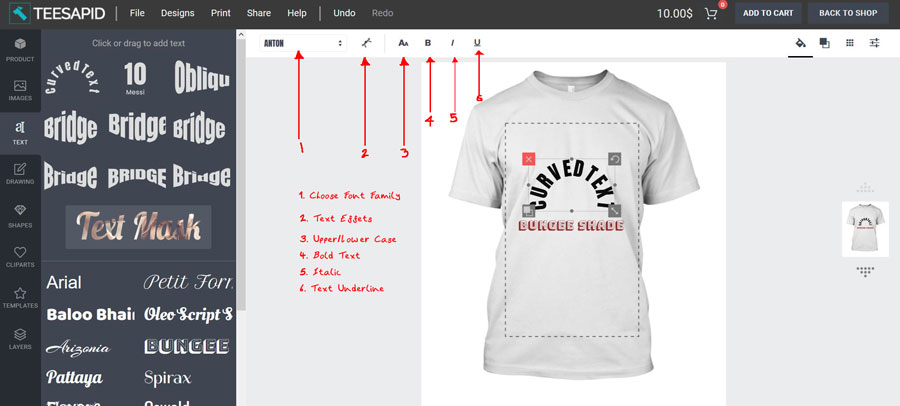
Within the add-text section you can a choose font family (type) of your own, change to uppercase or lower case, convert to italics, make your text bold and underline.
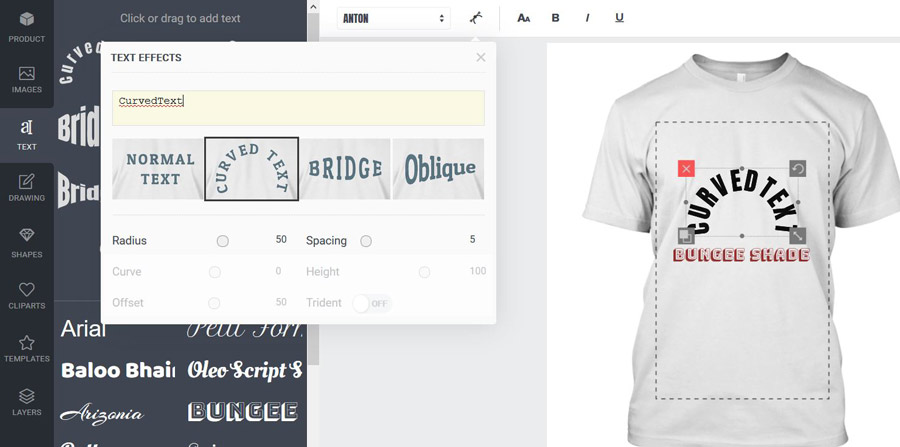
 There are also a variety of text effects as shown below.
 Note:
Note:
To change the default text, click on “text- effect” and thereafter type your text as shown above in text-effects diagram
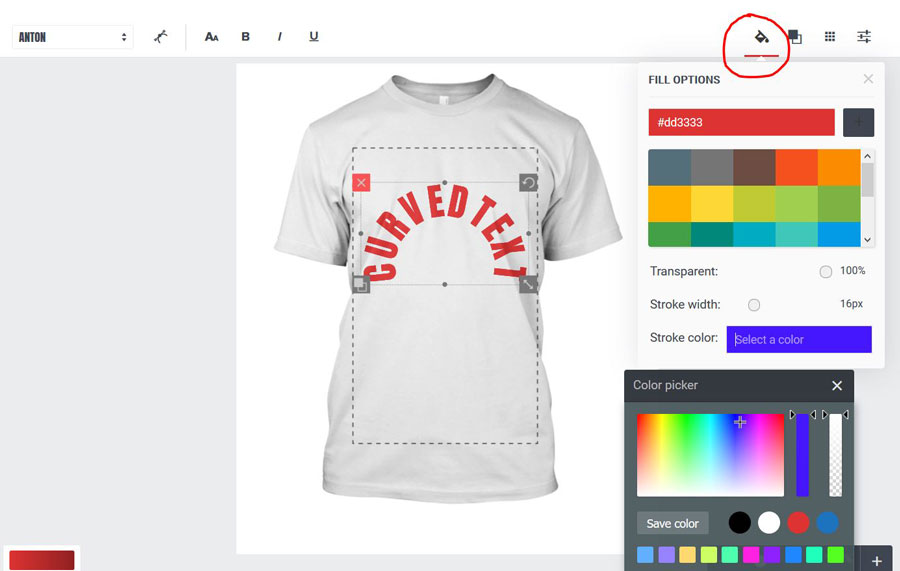
To Change font color, click on the fill options and select your color of choice as shown below.
Another advanced feature that comes with text is masking. Click on mask text and follow the instructions
Drawing
If you want to make a drawing on the fly simply click on drawing, change the brush size, select color and that is it!
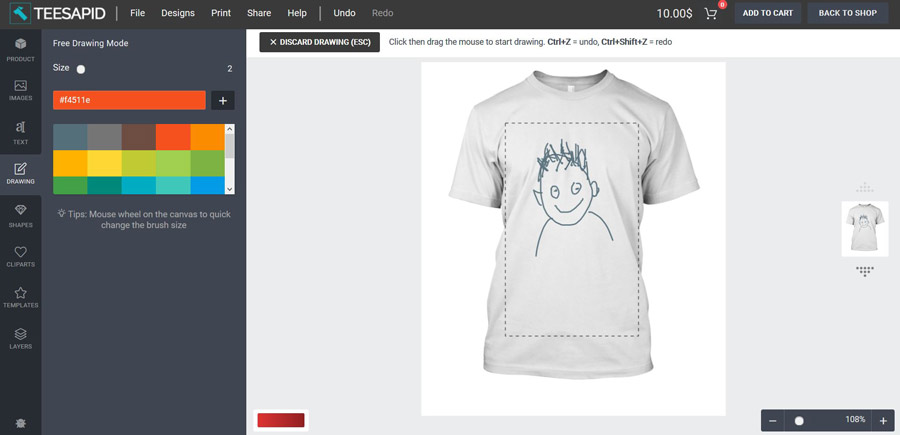 Use the layers function to delete unwanted parts of the drawing. The same function is also very important when using multiple elements.
Adding Shapes
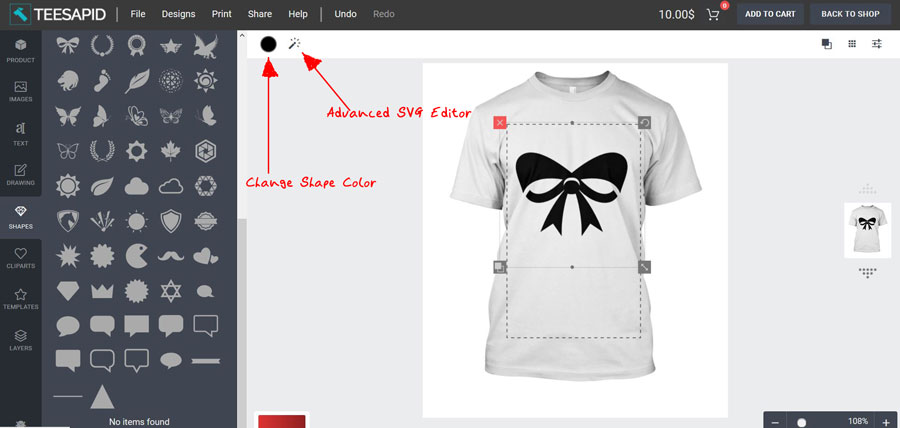
It is also possible to add a wide range of shapes to your custom design. Select any of the available, change the color or simply the advanced SVG editor to modify it further.
Adding Cliparts
The process is the same as that of adding shapes.
Templates
You can also add generic ready-made editable designs. Some are free while others may require a small fee. You can use them as they’re or templates from which you create your unique designs.
Note that you can use a single element or a combination of two or three for instance text and a photo, text, clipart and drawing. The choice is yours buddy!
Step3# Add to Cart
Once you are done, add to cart. It is that simple!
Online Customization Tool: More Functions
In addition to the above outlined task, the design edit tool can also help you achieve the following;
- Save your designs (if you’ve created an account).
- Search and View saved designs
- You can print your design if have a printing machine and required materials.
- Share the final personalized design on your favorite social media platforms.
If you are having difficulties while using this personalization web app, please do contact us. Our support is more than willing to help you out.
